Your cart (0)
Your cart is empty
Tax included and shipping calculated at checkout
Your cart is empty
Tax included and shipping calculated at checkout

There's nothing quite like the sound of rain on an RV roof: until that rain starts dripping onto your mattress at 2 AM. A single failed seam can turn a dream adventure into a soggy nightmare, complete with mold, rotted wood, and a repair bill that'll make you wish you'd spent twenty minutes on a ladder instead.
At BlackSeries, we build our trailers to handle the world's toughest terrains, from rocky desert trails to snow-covered mountain passes. But even the most rugged off-road travel trailer needs a little TLC to keep the elements outside where they belong. Whether you're towing a nimble 16 ft camper weight rig or managing a massive 30 foot rv weight home-on-wheels, your roof seams are working overtime: and they need your attention.
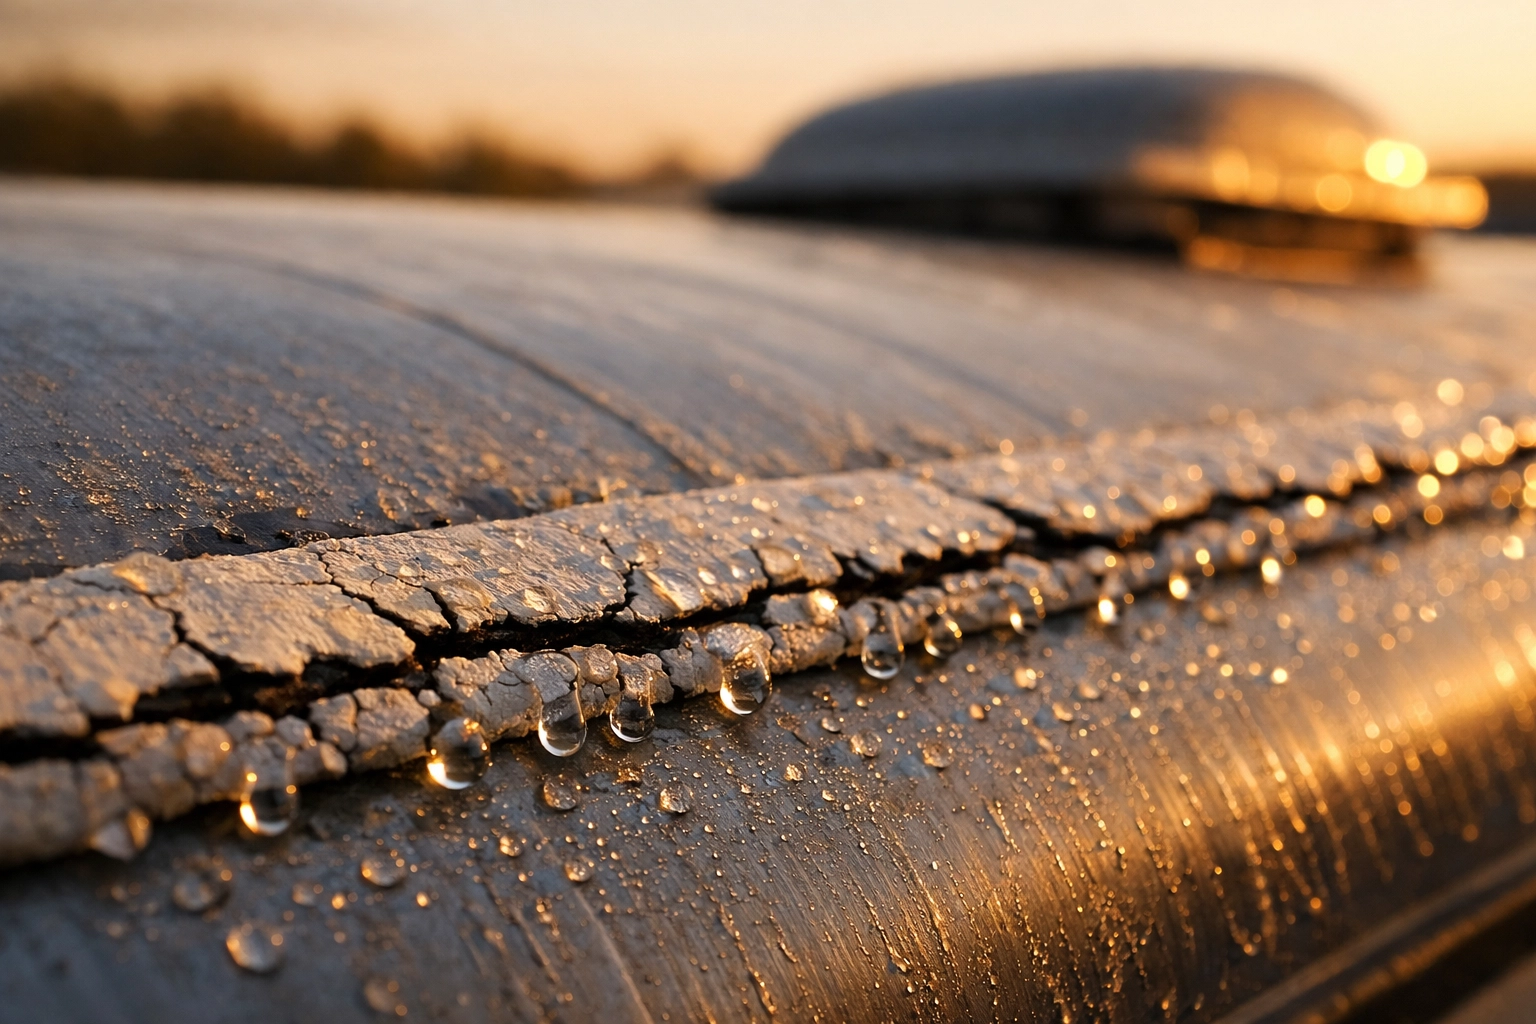
Your trailer's roof isn't a single, seamless piece of material. It's a carefully engineered collection of panels, vents, skylights, air conditioning units, and joints all held together by specialized sealants. Every time you hit the road, those seams vibrate. Every temperature swing causes expansion and contraction. Every sunny day bombards them with UV radiation that slowly breaks down even the toughest materials.
Here's the reality: the average 18 ft camper weight trailer has approximately 40-50 feet of seam length. Scale that up to a 30 ft rv weight model, and you're looking at 70-80 feet of potential leak points. That's a lot of opportunity for water to find a way inside.
The damage from a roof leak isn't just cosmetic. Water infiltration leads to:
The good news? Preventive maintenance is cheap, easy, and something any RV owner can do. Let's get you leak-proof.
Before you can fix anything, you need to know what you're dealing with. Grab a sturdy ladder, good lighting (early morning sun works great), and spend 30 minutes getting intimate with your roof.
Look for these warning signs:
Pro tip: If you own a 24 ft camper weight trailer or larger, you'll have significantly more seam length to inspect than compact models. Budget your time accordingly. Take photos of problem areas so you can track them over time.
This step separates amateurs from professionals. Sealant will not bond to dirt, old sealant residue, or oxidized surfaces. You need a clean, receptive surface for proper adhesion.
The cleaning process:
For stubborn residue on aluminum roofs, a dedicated RV roof cleaner works wonders. Avoid petroleum-based products on rubber roofs: they'll cause more harm than good.

Now comes the actual sealing. Here's how to do it right:
Self-Leveling Lap Sealant:
Non-Sag Sealant:
Butyl Tape (Eternabond):
Material-specific considerations:
The average 30-foot camper weight trailer typically requires 2-3 tubes of self-leveling sealant for a complete reseal. Smaller 16 ft camper weight models might only need one tube plus a roll of butyl tape.
Now comes the actual sealing. Here's how to do it right:
For Self-Leveling Sealant:
For Butyl Tape Application:
Common application mistake: People apply sealant like frosting a cake: big, thick globs everywhere. More isn't better. A thin, even layer that's properly adhered beats a thick, poorly applied layer every time.
Patience pays here. Most sealants need 24-48 hours to fully cure before you can safely drive or expose them to rain. Check the product specifications and add 25% to the recommended time if you're in humid conditions or temperatures below 60°F.
After curing, inspect your work:

Applying new sealant over old, degraded material is like putting a fresh coat of paint over rust. The base is compromised, so your repair won't last. Always remove old sealant completely before starting fresh.
That hairline crack near the air conditioner? It's not "too small to worry about." Water finds every opening. Capillary action can pull moisture through gaps that seem invisible to the naked eye. If you can see it, seal it.
While adding too much sealant won't affect your average travel trailer weights significantly (we're talking ounces, not pounds), it creates other problems. Excess material can trap water underneath, create ugly drips on your sidewalls, and actually accelerate degradation by preventing proper air circulation.
Using a silicone sealant on a TPO roof, or vice versa, creates adhesion problems. The repair might look fine initially but will fail within months. Always confirm material compatibility before purchasing products.
Winter separates leak-proof trailers from disaster zones. When water infiltrates a seam and then freezes, it expands by roughly 9%. That tiny crack becomes a gaping hole. For owners who embrace winter camping, this is non-negotiable maintenance.
Winter-specific sealing strategies:
Pro winterization tip: After sealing, apply a protective roof coating with UV inhibitors. This creates a sacrificial layer that takes the brunt of sun damage, extending your sealant life by 2-3 years.
Here's the maintenance cadence that actually protects your investment:
Every 3 Months (Quarterly):
Every 6 Months (Semi-Annual):
Every 2 Years (Biennial):
As-Needed (Event-Based):
The reality? Most RV owners neglect roof maintenance until they see water dripping inside. By then, they're looking at repairs measured in thousands rather than the $50-$100 cost of preventive sealing.

Our BlackSeries trailers come with reinforced aluminum frames, powder-coated exteriors, and premium roof materials designed for decades of abuse. The HQ12, HQ15, HQ17, and HQ19 models all feature factory-sealed seams using commercial-grade butyl tape and silicone lap sealant.
But here's the truth: No trailer is maintenance-free. Our off-road design means you're taking your rig places where most travel trailers would never dare to go. That increased capability comes with increased responsibility. The good news? When you maintain a BlackSeries properly, it'll outlast three conventional trailers.
We've seen 10-year-old BlackSeries units with original seals still holding strong: because the owners followed a maintenance schedule. We've also seen 2-year-old units with water damage because the owners assumed "off-road tough" meant "indestructible."
Your trailer is an investment. Twenty minutes on a ladder twice a year protects that investment better than any extended warranty.
How often should I inspect and maintain my travel trailer roof seams?
Inspect quarterly (every 3 months) for visible problems from ground level. Perform a thorough roof inspection twice yearly: once before summer camping season and again before winter storage. Complete resealing should happen every 2 years or immediately when you notice cracks or lifting sealant.
What's the best weatherproofing solution for my travel trailer roof?
It depends on your roof material. For EPDM rubber roofs, use EPDM-rated lap sealant and primers. For TPO roofs, use TPO-compatible products. For aluminum or fiberglass roofs, multi-purpose self-leveling lap sealant works excellently. Butyl tape (like Eternabond) is universally effective for straight seams across all roof types. Always confirm material compatibility before purchasing.
Can I use the same sealant for the entire roof or only the seams?
Use self-leveling lap sealant specifically for seams, screw heads, and joints. For full roof coating, use dedicated roof coating products that are thinner and designed to cover large surface areas. Trying to coat an entire 30 ft camper weight roof with lap sealant would be expensive, thick, and create drainage problems. Each product serves a specific purpose.
How do I know if my roof sealant is still effective after a year of travel?
Perform the "press test": gently press on the sealant with your thumb. It should feel firm but slightly flexible, not brittle or soft/sticky. Look for spider-web cracking, chalky residue (UV degradation), or lifting edges. Inside your trailer, check ceilings near seams for water stains or discoloration. If you see any of these warning signs, it's time to reseal regardless of how old the sealant is.
Do I need special tools to waterproof my RV roof seams?
The basic toolkit is inexpensive and simple: a sturdy ladder, caulking gun ($8), plastic scraper, isopropyl alcohol, lint-free cloths, putty knife, and work gloves. For tape application, add a small roller or squeegee ($5). Total investment: under $50 for tools you'll use repeatedly. The sealant itself runs $15-$30 per tube, and most trailers need 2-3 tubes for a complete reseal.
Roof seam maintenance isn't glamorous. It doesn't come with Instagram-worthy photos or bragging rights around the campfire. But it's the single most important maintenance task that separates trailers that last 20+ years from those that rot out in 5.
Whether you're towing a compact 16 ft camper weight weekend warrior or a spacious 30 foot rv weight full-time home, your roof is working 24/7 to protect everything below it. Give it 30 minutes of attention twice a year, and it'll reward you with decades of leak-free adventures.
Don't wait until you're mopping water off your floor at a remote campsite with no cell service. Check your seams today. Your future self: and your wallet: will thank you.
Ready to start your leak-proof journey? Visit a BlackSeries service center or check out our maintenance guides for more tips on keeping your trailer adventure-ready. And if you're in the market for a trailer that's built tougher from day one, explore our full lineup of off-road capable models.
Stay dry out there.
Explore the Black Series lineup
Ready for the trail? See the Black Series off-road trailers for sale — and browse the full lineup.
Related reading: